Equipment
The PiFinder can track the telescopes and eyepieces you observe with. Telling it about your gear is optional, but it unlocks several conveniences: it works out the magnification and true field of view for any telescope-and-eyepiece pairing, sizes and orients the survey images on the Object Details screen to match the eyepiece view, and lets the push-to arrows follow the way your setup moves.
You manage equipment from two places: the Web Interface is where you add and edit telescopes and eyepieces, and the Equipment screen on the PiFinder is where you pick which ones are active for tonight’s session.
Telescopes and eyepieces
A telescope records the optical details of one instrument: make and name, aperture, focal length, central obstruction, and mount type, plus a few display options covered below. Aperture and focal length drive the magnification and field-of-view calculations.
An eyepiece records its focal length and apparent field of view, plus the field stop if you know it, which gives a more precise field-of-view figure. Store as many of each as you like and switch between them as the night goes on.
Adding and editing your gear
Add telescopes and eyepieces through the Web Interface. Connect to the PiFinder as described there, then open the Equipment page from the navigation menu. You’ll find a list of telescopes and a list of eyepieces, each with buttons to add, edit, or remove an item.
A new PiFinder starts with a generic 200mm Dobsonian and a small set of Plössl eyepieces so the calculations work out of the box. Edit or replace these with your own gear whenever you’re ready.
Note
The on-device Equipment menu builds its list of telescopes and eyepieces when the PiFinder starts up. If you add new gear in the web interface while the PiFinder is running, restart the PiFinder so the new items appear in the on-device selection lists.
Choosing your active telescope and eyepiece
The PiFinder uses one active telescope and one active eyepiece at a time for its calculations and displays. Set these from either place:
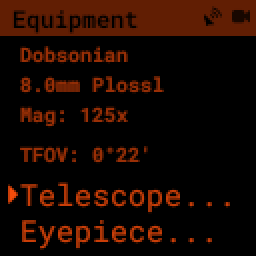
On the PiFinder, open the Tools menu and select Equipment. The Equipment screen shows the active telescope and eyepiece and, when both are set, the resulting magnification and true field of view. Choose “Telescope…” or “Eyepiece…” to pick from your stored gear.
In the web interface, use the Equipment page to mark a telescope or eyepiece active.
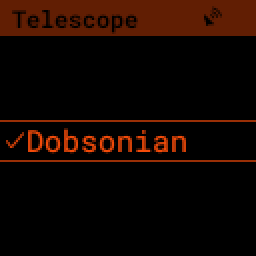
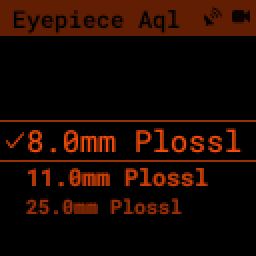
Choosing “Telescope…” or “Eyepiece…” opens a list of your stored gear, a check mark beside the active one. Use the UP/DOWN arrows to highlight an item and RIGHT to make it active.
If nothing is selected, the PiFinder skips the magnification and field-of-view figures and shows the object image in its default orientation.
Magnification and true field of view
With an active telescope and eyepiece set, the PiFinder shows two numbers on the Equipment screen:
Magnification is the telescope’s focal length divided by the eyepiece’s. A 1000mm telescope with a 25mm eyepiece gives 40×.
True field of view (TFOV) is how much sky you see through that combination, in degrees. Compare it against the push-to distance: when the object is within half your true field of view of the centre, it’s in the eyepiece.
The true field of view also sets the starting zoom of the survey image on the Object Details screen, so the image frames roughly the same patch of sky your eyepiece shows. Zoom in and out from there with the + and - keys.
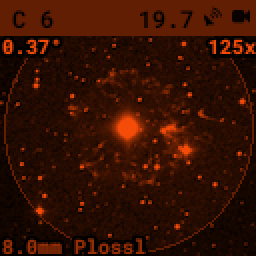
Both figures appear on the object image too — field of view in the top-left corner, magnification in the top-right — so you always know the scale of what you’re looking at.
Matching the object image to your eyepiece: flip and flop
The survey images on the object details screen are oriented to match your eyepiece view, so you can compare them directly. Different telescopes flip the view in different ways, so two per-telescope options let you correct the orientation:
Flip image (upside down) mirrors the image top to bottom.
Flop image (left right) mirrors the image left to right.
You don’t need to reason about your optics. Point at a bright, recognisable object, compare the object image to your eyepiece view, and toggle the two options until they match:
If the image is upside down compared to the eyepiece, turn on Flip.
If the image is mirrored left-to-right, turn on Flop.
If it’s both, turn on both.
As a starting point for common setups:
Your telescope |
Flip |
Flop |
|---|---|---|
Newtonian / Dobsonian |
off |
off |
Refractor or SCT, straight through (no diagonal) |
off |
off |
Refractor or SCT with a star diagonal |
one of the two — try Flop first |
|
Refractor with a correct-image (erecting) diagonal |
on |
on |
A plain Newtonian or Dobsonian needs neither option, which is why both are off by default. A star diagonal produces a mirror image, so you’ll need exactly one of Flip or Flop; which one depends on how the diagonal sits in the focuser, so pick whichever makes the image match.
Note
Early PiFinder software shipped the default Dobsonian with Flop turned on by mistake. If a Newtonian or Dobsonian image looks mirrored, open the telescope in the Equipment page and turn Flop off.
Reversing the push-to arrows
The same telescope settings include Reverse Arrow A and Reverse Arrow B, which flip the push-to arrows so they point the way your telescope actually moves. If nudging the scope in the direction an arrow points sends the target further away instead of closer, turn on the matching reverse option. The two arrows cover the two directions of movement, so enable A, B, or both until the arrows guide you the right way.