Software Setup
Once you’ve built or otherwise obtained a PiFinder, here’s how to set up a fresh SD card to run it. The recommended way is to download the current prebuilt release image and use the Raspberry Pi imager to burn it and configure your wifi. If you prefer, you can build an image from scratch following the instructions below.
Prebuilt Release Image
The image files on our release pages bundle the correct Raspberry Pi OS version, the installed and configured PiFinder software, and all the deep sky catalog images. This is the recommended way to get PiFinder onto an SD card, however you built or purchased the unit.
Download the latest release image from our releases page
Install the Raspberry Pi imager: https://www.raspberrypi.com/software/
Run the imager, click ‘Choose OS’, select ‘Use Custom’, then choose the image you downloaded


To let the PiFinder connect to your network, click the gear icon at the lower left and fill in:
SSID: The name of your wifi network
Password: The password for your wifi network
Wireless LAN Country: Where you live, so wifi follows local regulations
You can also set your locale and keyboard, but the PiFinder software ignores these; they only affect the underlying operating system.

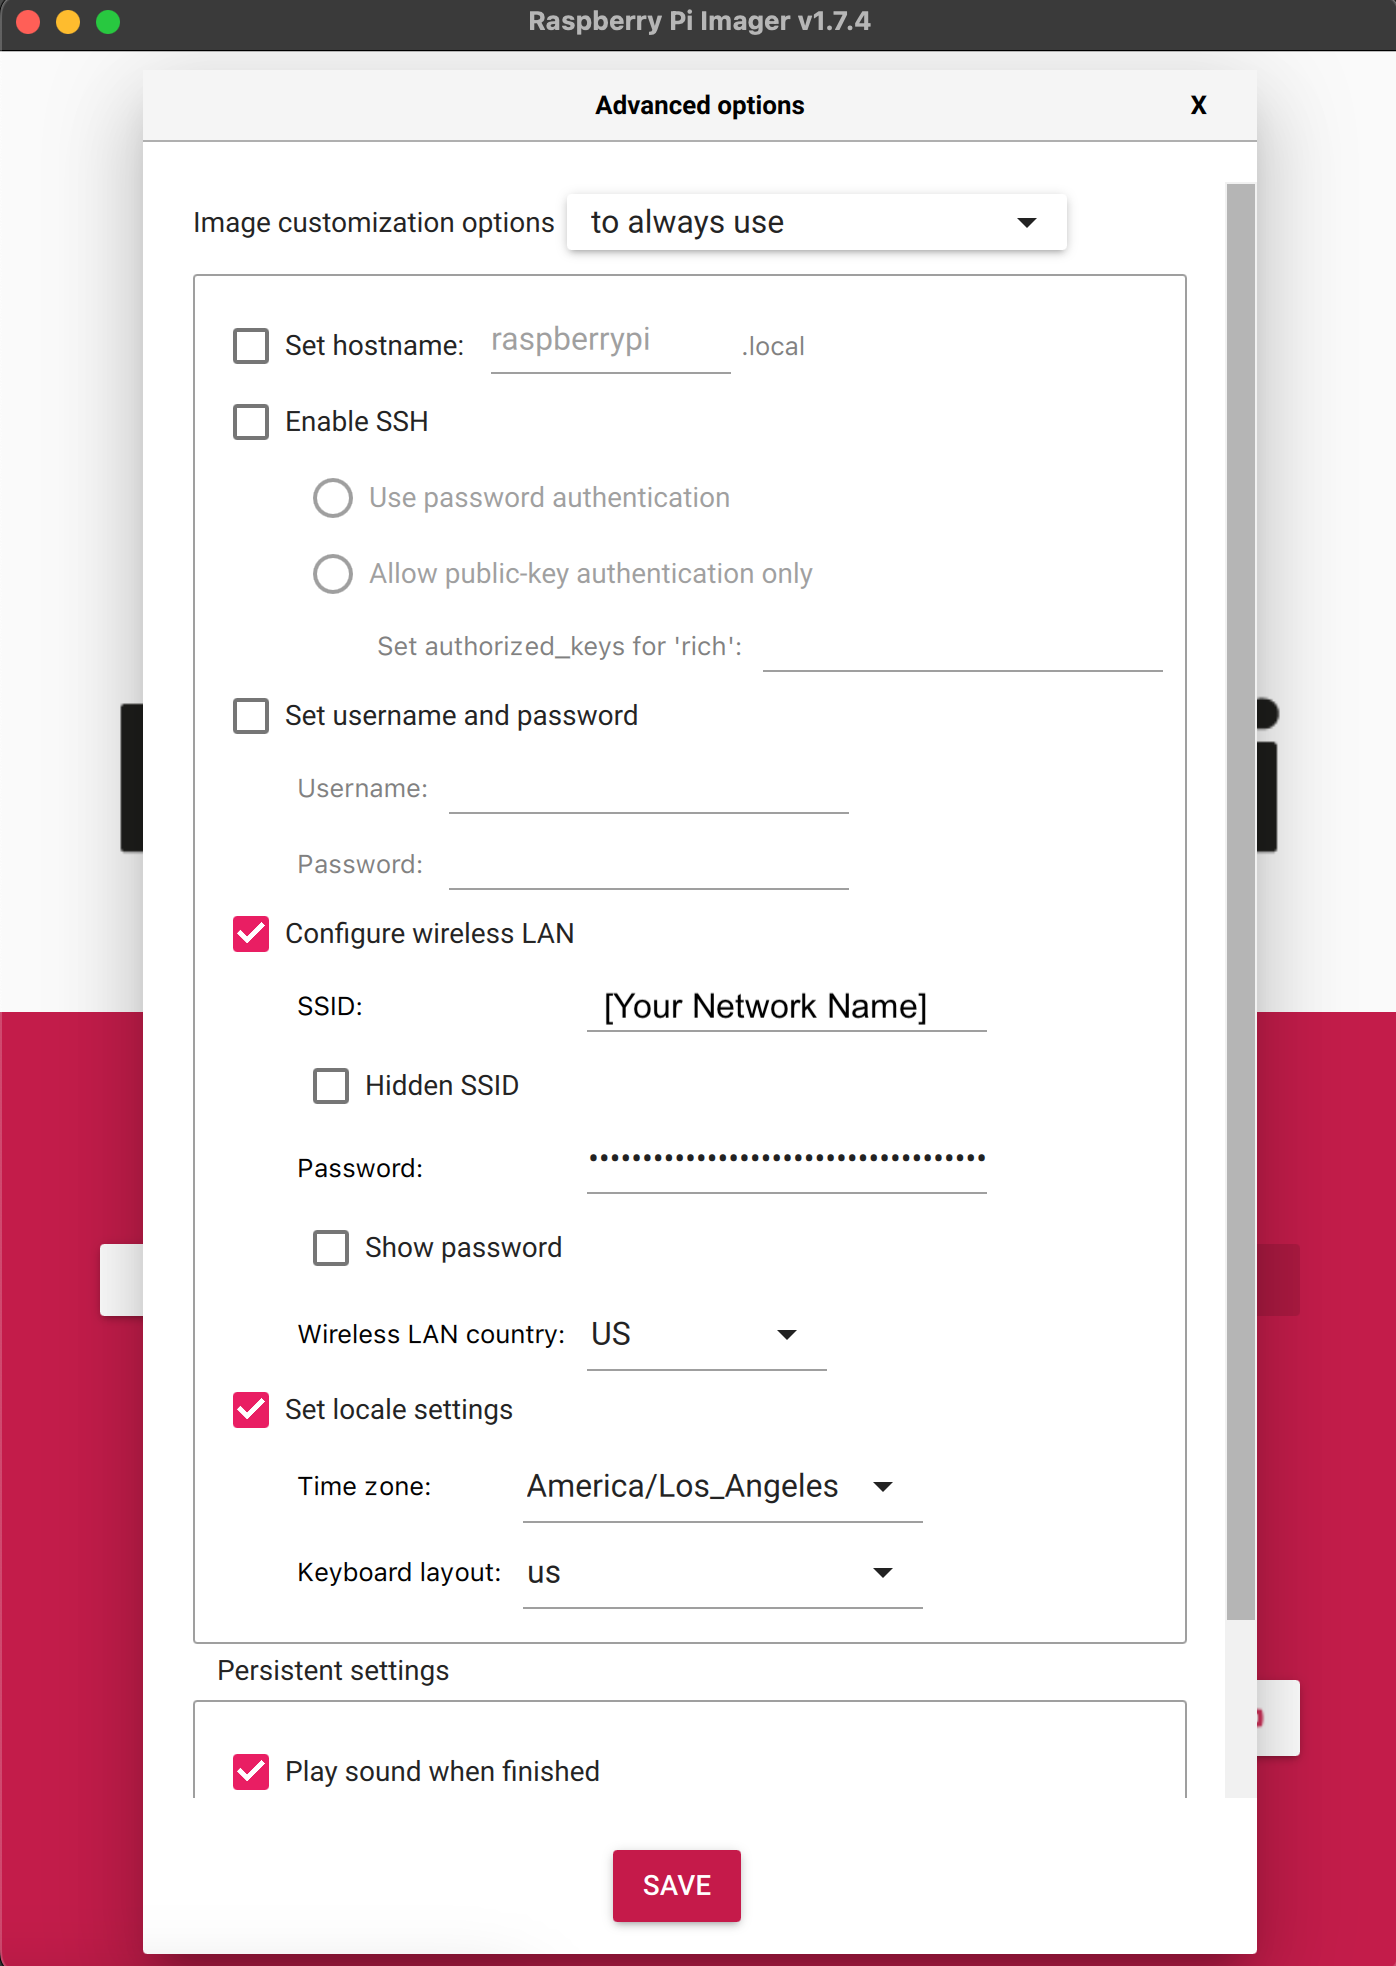
Important
Do not set the hostname or username/password. SSH is enabled on this image by default.
Click ‘Select Storage’ and choose the SD card on your computer
Click ‘Write’ to start
Note
If the imager reports that the image is “not a multiple of 512 bytes” (or otherwise refuses to write it), the download was incomplete or corrupted. Download the release image again and retry.
Once writing is complete, insert the SD card into your PiFinder and power it up. The first boot takes a bit longer as it expands the filesystem to fill the card, so be patient.
With the software installed, you’re ready for the Quick Start Guide and a night of observing.
Build From Scratch
Warning
You probably do not want to do this. These instructions are primarily for developers who are making a new image file from scratch. To just use your PiFinder you will want to use the instructions above to download and use a pre-built image for your sd card.
You can do this completely headless (no monitor or keyboard) if you like.
General Pi Setup
Important
You must use the specific Raspberry Pi OS version listed here or the PiFinder software will not work. The software is designed and tested for a specific version with each release.
Create the image using the Raspberry Pi imager. It’s available for most platforms and makes it easy to set up wifi and SSH.
Select the 64-Bit version of Pi OS (Legacy) Lite (No Desktop Environment)
Make sure you select the Legacy Bullseye option here
Set up SSH / Wifi / User and Host name using the gear icon. Below is a screengrab showing the suggested settings.
The username must be
pifinderCustomize the host name, password, network settings, and locale for your needs.

Once the image is burned to an SD card, insert it into the PiFinder and power it up. The first boot will probably take a few minutes.
SSH into the PiFinder using
pifinder@pifinder.localand the password you set up.Update all packages. This isn’t strictly required, but it’s good practice.
sudo apt updatesudo apt upgradeEnable SPI / I2C, which the screen and IMU use to communicate.
run
sudo raspi-configSelect 3 - Interface Options
Then I4 - SPI and choose Enable
Then I5 - I2C and choose Enable
PiFinder Software Install
You now have a fresh install of Raspberry Pi OS. The rest of the setup is handled by the pifinder_setup.sh script in this repo. Download and run it in one step:
wget -O - https://raw.githubusercontent.com/brickbots/PiFinder/release/pifinder_setup.sh | bash
The script will:
Clone this repo
Install the needed packages/dependencies
Download some required astronomy data files
Set up Wifi access point capabilities
Create a samba share for pulling images and observation logs and adding observing lists
Set up the PiFinder service to start on reboot
Once the script finishes, reboot the PiFinder:
sudo shutdown -r now
Booting takes up to two minutes, but you should see the startup screen before long:

Catalog Image Download
The PiFinder can display catalog object images when they’re present on your SD card. These images take about 5gb of space and can take several hours or more to download, but you can cancel and resume at any time.
The Prebuilt Release Image already includes these images and is much quicker to download as a single file from your main computer.
To download the catalog images, put your PiFinder in WIFI client mode so it can reach the internet, then SSH into it using the password you set up initially.
Once connected, type:
cd PiFinder/python
python -m PiFinder.get_images
The PiFinder checks which images are missing and starts downloading. You can monitor progress on the status bar.

There are 13,000+ images, so it takes a while, but you can do it across multiple sessions. The PiFinder uses whichever images you have on hand each time you observe.